Tuesday, March 25, 2025

Top 10 things you DON'T want to do with your digital camera!

This blog post is LONG OVERDUE and I have been meaning to write it for quite some time. As opposed to most of my other blog posts where I encourage all of you to DO or TRY certain things with your digital cameras, this blog post is just the opposite. I am going to cover the top 10 things that you should NOT do with your camera.

I have compiled this list from 20 years of being a full-time photographer, but also from many years of leading photo tours and teaching others. Some of these are absolutely imperative and can ruin your camera or images and others are precautionary tips to protect your gear. So without further ado, let's get right to the list.


DO NOT CHANGE LENSES WITH YOUR CAMERA UPSIDE DOWN!

If you have gone on a photo tour with me, you know that this is something I always caution people about on day 1. Any time I see someone changing a camera with the lens opening facing up I cringe. Doing this allows any dust in the air to fall into the camera and create nasty dust spots on your images. Do NOT do this! And do not leave your camera exposed (without a lens) for any prolonged period of time. Whenever I change lenses, I try to do so as quickly as I can and I never do this in a windy, dusty environment. (Note: I even used one of my older cameras to take this photo because I did not want to expose any of my current cameras to dust.)


DO NOT DELETE IMAGES IN YOUR CAMERA

I wrote a blog post about this way back in 2016 and it is one of my most read posts ever with almost 400k reads. Even though a lot has changed in 9 years, this tip still holds. I know many people who say "I delete images in my camera all the time and have not had a problem", but regardless, I never recommend doing this. It can cause corruption in your memory card and you can lose images. You can format the card in your camera, but don't delete individual images.


FORMAT MEMORY CARDS IN YOUR CAMERA AND NOT ON YOUR COMPUTER

It is a really good idea to format your memory cards whenever you are photographing a new event, but I always recommend doing this in your camera and not on your computer. The reason is this: your camera will format the card the way that it wants to, adding the appropriate data structure and folders. I even make sure to format my memory cards in the same camera model I am using it in. In other words, if I am using a CFexpress card in my Canon R1, I format it in that camera. If I use that same card in my Canon R5 Mark II, I format the card in that camera.

 
DO NOT USE YOUR CAMERAS BATTERY UNTIL THEY ARE COMPLETELY DRAINED

When I see that my battery indicator is blinking red, I almost always change batteries at that time. Will I push that a little bit? Sure. But I never shoot until the battery is dead. The reason that this is bad is because if you take a photo and the camera is in the middle of writing that image to your memory card when the battery dies, it can cause you to lose ALL of your images. I also do not fill my memory cards completely for the same reason. I don't want the camera to be writing part of the image and then the card fills. The newer cameras are basically computers as much as image capturing devices, but I don't want to leave anything to chance.


DON'T LET THE CAMERA DETERMINE YOUR FOCUS POINT

Many of the newer mirrorless camera have subject and face detection, but for any camera that does not, you want to determine where the focus is, and not leave that up to the camera. I can not tell you how many times I have helped a new camera owner with their settings and see this left as a default. Most consumer cameras (especially DSLRs) ship with all the focus points turned on, and defaulted to auto select. This means that when a novice picture taker hits the shutter button, the camera tries to determine the subject and what should be in focus. I really hate this! If you are using one of the older cameras, or if your camera randomly picks a focal point, I really encourage you to learn how to manually select that point. You will thank me for that at some point.


DO NOT LEAVE THE "RELEASE SHUTTER WITHOUT CARD" ON!

This is one of my biggest pet peeves and, for the life of me, I do not understand why the camera companies set this as a default. Why would you ever want to use your camera without a memory card??? As soon as you get your camera back in your hands, make sure this is turned off. I know several people who have gone out and photographed something like their kid's soccer game (Mike - you know who you are) to later find that they had no card in the camera and they have not one photo of the game. I have heard that the camera companies default this on so that the resellers can demonstrate the cameras without a card, but I do not like the fact that the reseller is prioritized over the user.


PUT YOUR LENS HOOD ON THE RIGHT WAY!


For all of you who have gone on photo tours with me, you have heard me push this point many times. Sure, the lens hoods ships to you in the reverse position (as seen above) because they fit better in the box, but that does not mean that you should leave them this way. Turn them around! Why? There are three reasons that you want your lens hood turned around:


1. It is good protection for the front element of your lens. If you drop your camera or bang the lens against something, you would much rather scratch or break a lens hood than break the lens.


2. The hood helps protect light from hitting the front element of your lens, which can ruin your photos (unless you are looking for that effect).


3. It is much easier to zoom or refocus a lens with the hood not in the way.


DO NOT THROW YOUR CAMERA INTO AN UNPROTECTED BACKPACK

You cameras and lenses are built to last but that does not mean that they like to be banged around. I always cringe when someone shows up to one of my photos tours with their camera equipment in a standard backpack with no separators. I use the ThinkTank bags for my camera gear and never put them in a situation where one piece of equipment might bang into another.


AVOID SALT WATER

This is one tip that I have added mainly because I have broken this rule more than once and paid the price for it. When photographing the image that you see above, I was on the front of a small boat in the ocean off the coast of Mexico. I was working hard to get this shot, but myself and my camera were getting drenched from the waves crashing against the front of the boat. A month later that camera was in for repair at Canon Professional Services and the body was corroded. It was an expensive mistake on my part. I highly recommend using a protective device over the camera or staying away from salt water altogether. Note: I have found that fresh water is much less of a hazard and I rarely ever use rain covers when shooting in the rain forest.


DON'T USE THE CAMERA STRAPS THAT COME WITH YOUR CAMERA


When I get a new camera, the camera strap stays in the box. I don't even bother to take it out. Spending more than 20 years of my life with a camera on my body, I have come to loathe any neck strap. I never recommend using the camera company straps because of the strain that it puts on your neck. I use the BlackRapid straps because they are well made, but mostly importantly they go across my body which is WAY more comfortable.


I hope that these tips help you in the future!


__________________________________________________________


• Subscribe to the Jeff Cable Photography Blog by clicking HERE!


• You can now purchase Jeff Cable Photography images from my new fine art site at: https://fineart.jeffcable.com/

• If you are interested in purchasing ANY equipment, please click here to go to B&H Photo, as I get a referral from them if you enter this way. It does not change the cost to you in any way, but it helps me keep this blog up and running.

• Check out my upcoming photo tours to amazing places around the world. I have photo tours to Costa Rica, Peru, Galapagos, Alaska and more.

_________________________________________________________________

Monday, March 17, 2025

I will be presenting Wed evening - join in for FREE

I will be presenting "How My Olympic Photography Makes Me a Better Wildlife Photographer" this Wednesday evening at 7pm PST. This is part of the Peninsula Camera Club User Group, and they have been nice enough to allow any of you to join in for the presentation.


The Zoom link is:

https://us06web.zoom.us/j/84868501100?pwd=6JbTioxKF5cNjwpoCA2aDO7fvuOOux.1


Meeting ID: 848 6850 1100

Passcode: 715283


When you enter, please let them know that you have been invited by Jeff Cable and they will let you in.


I hope to see you there,


__________________________________________________________

• Subscribe to the Jeff Cable Photography Blog by clicking HERE!

• You can now purchase Jeff Cable Photography images from my new fine art site at: https://fineart.jeffcable.com/

• If you are interested in purchasing ANY equipment, please click here to go to B&H Photo, as I get a referral from them if you enter this way. It does not change the cost to you in any way, but it helps me keep this blog up and running.

• Check out my upcoming photo tours to amazing places around the world. I have photo tours to Costa Rica, Peru, Galapagos, Alaska and more. 

 _________________________________________________________________  

Wednesday, March 5, 2025

Top 10 Features of Photoshop Every Photographer Should Know - Now on YouTube!

I recently taught another class for the B&H Event Space, called "10 Best Features of Photoshop Every Photographer Should Know," and it's now available online (thanks to Zenfolio for sponsoring)!

In this session, I started with a few slides before diving into a live demonstration, showing how I retouch my images using a core set of essential Photoshop tools. My focus was on enhancing a good photo with minimal effort, rather than overwhelming you with every feature available.

Honestly, I could have named it "The Hundreds of Photoshop Features You Don’t Need to Know"—but… 😆

You can check out the recorded video HERE or by clicking on the image below.


I hope you enjoy the video and learn something too.

And remember that the "J Tool" stands for "Jeff's favorite tool"!


__________________________________________________________

• Subscribe to the Jeff Cable Photography Blog by clicking HERE!

• You can now purchase Jeff Cable Photography images from my new fine art site at: https://fineart.jeffcable.com/

• If you are interested in purchasing ANY equipment, please click here to go to B&H Photo, as I get a referral from them if you enter this way. It does not change the cost to you in any way, but it helps me keep this blog up and running.

• Check out my upcoming photo tours to amazing places around the world. I have photo tours to Costa Rica, Peru, Galapagos, Alaska and more. 

 _________________________________________________________________  

Thursday, February 27, 2025

My B&H presentation on Photo Tours - Recorded and online

Yesterday, I had the opportunity to give another presentation at the B&H Event Space, titled "Photo Tours - The Best of Travel Photography." In this session, I explored what defines a great photo tour and shared valuable insights on how to select the right one for your needs.

I kicked off the presentation with six key slides packed with useful information, aimed at providing a solid foundation for everyone. Then, I showcased a wide selection of images from past photo tours, discussing the best camera gear suited for various locations and subjects, and offering practical advice to help attendees capture stunning travel photographs.

You can check out the recorded video HERE or by clicking on the image below.

I was supposed to have another presentation today on "The 10 Best Features of Photoshop" but B&H had some technical issues, so it was postponed to next Tue, March 4 and 12pm PST (3pm EST). You can join in for that one from this page, and I will post it here on the blog when that one is completed.

And even though most of my photo tours are sold out for this year. I have a few openings left.

* 4 spots available for the Peru photo tour (June 24 - July 7)

* 4 spots available for the Galapagos photo tour (July 10 - 20)

All of my Costa Rica trips have been sold out for this year, but I just added new dates for 2026. I also will have many other cool adventures to come, which will be announced at a later date.

You can find more information of my tours HERE.

As always, these are first come, first serve. You can email me if you want to reserve a spot.

I hope you enjoy the video and learn something as well.


__________________________________________________________

• Subscribe to the Jeff Cable Photography Blog by clicking HERE!

• You can now purchase Jeff Cable Photography images from my new fine art site at: https://fineart.jeffcable.com/

• If you are interested in purchasing ANY equipment, please click here to go to B&H Photo, as I get a referral from them if you enter this way. It does not change the cost to you in any way, but it helps me keep this blog up and running.

• Check out my upcoming photo tours to amazing places around the world. I have photo tours to Costa Rica, Peru, Galapagos, Alaska and more. 

 _________________________________________________________________  

Monday, February 17, 2025

A little R&R in Hawaii - but I have to take photos too!

I spent the last week on the island of Kauai to try and relax and enjoy the sun a little. If you know me, you know that I don't relax very well. I am not the type of person who lays on a beach or sits by the pool for hours at a time. I like to get out and explore, and that is what we mostly did on our vacation to this quiet Hawaiian island.


On our first full day, we did a pretty challenging hike to get a nice view of Hanalei Bay.  As you can see, the weather was really good, with clear skies and temperatures in the low 80s. I decided to hike up with my Canon R5 Mark II camera and the RF 24-105mm lens. I also used a Tiffen Circular Polarizing filter to accentuate the color of the water and sky.


We also hiked along some of the rivers, enjoying the lush greenery and serene scenes.


If you have ever been lucky enough to visit Kauai, you know that there are wild chickens everywhere on the island. Most of the t-shirts and other souvenirs have pictures of the chickens since they are unofficially the mascots of the island. I used the Canon R5 Mark II and the RF 100-500mm lens to grab this shot. Yeah, it is a chicken, but I love the colors of this bird.


On the southern coast of the island (near Poipu Beach) is the Spouting Horn, which is a natural blowhole through the lava rock. Using the same camera with the RF 24-105mm lens, I took numerous slow shutter photos of the water blowing up. This photo was taken at 1/13th second.


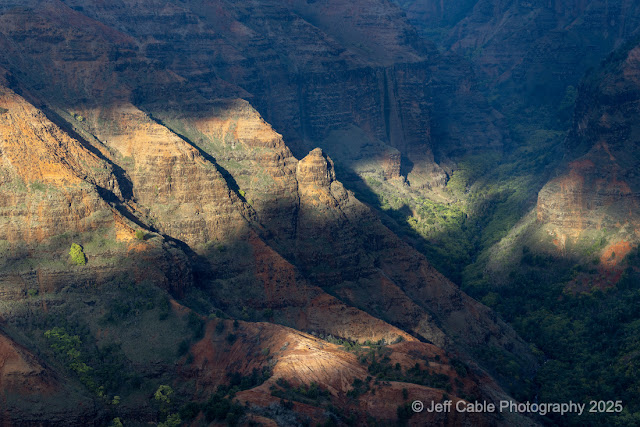
After visiting the Spouting Horn, we made the drive up to get a view of the Waimea Canyon. It was really beautiful to see all the different colors in the mountains, as well as the shadows from the clouds, which created constantly changing scenes. 


I used the RF 100-500mm lens for this photo, to isolate the one peak which was lit nicely. 


I also took 4 photos with the RF 24-105mm lens so that I could stack them in Adobe Photoshop and create this panoramic photo. 


After photographing the canyon, it was time to drive back down towards the coastline. Since we were driving right by the Spouting Horn once again, it seemed like a great spot to stop and watch the sunset. I took another photo, this time with the last bit of sunlight on the water. This exposure was at 1/6 sec.


This is the view to the right of the Spouting Horn. The setting sun was mostly behind a tree, but the low light let me slow the shutter speed down to half a second to show more of the motion of the water. I saw the small blowhole to the right and noticed the rainbow effect on the spray. So pretty! 


On our second to last day on Kauai, we took a boat ride to see the amazing Na Pali Coast. Before getting on the boat, we made a quick visit to Glass Beach. There used to be a ton of polished glass here, but now it is all gone. All was not lost as this seal decided to give me a subject for a photo.  


The boat trip was 5 hours (which was a bit long) but on the way out we saw some Humpback whales breaching. Using the long lens, I was able to capture this image of a whale jumping above the surface of the water. I was happy to have the Canon R5 Mark II since the higher megapixels gave me room to crop and get this shot.


The Na Pali Coast is incredibly beautiful with the layers of color and interesting terrain.


Right before we turned around and left the Na Pali Coast, we past this small archway in the rock. At first I was going to zoom in and try and take a close shot of the arch, and then I saw the beautiful "gods rays" coming over the rocks. I zoomed out and took this wide shot instead, and I am glad that I did. 


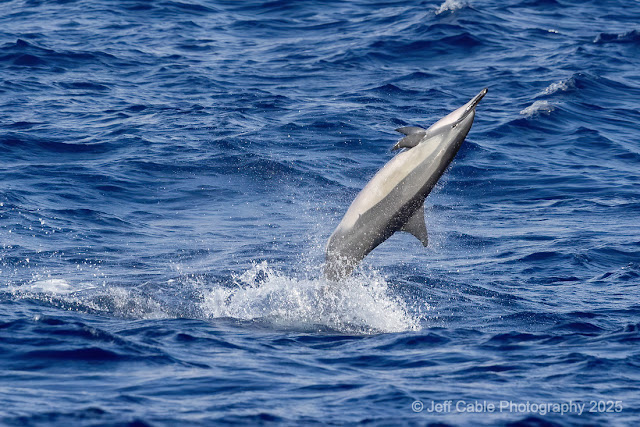
On our way back, we came across some spotted dolphins that were jumping out of the water. I was super excited to photograph these dolphins, since they are my favorite animals. 


I burst off numerous photos of this particular dolphin as it jumped and spun before re-entering the water.


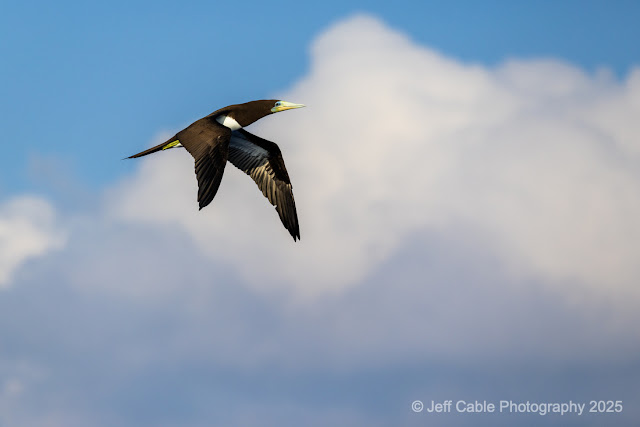
We also had some birds flying near the boat and I photographed them in the clouds...


...and flying lower so that I could include the Hawaiian shoreline in the photo.

Now I am back home and back to the rat race. I miss Hawaii already and look forward to the next trip there. 


__________________________________________________________

• Subscribe to the Jeff Cable Photography Blog by clicking HERE!

• You can now purchase Jeff Cable Photography images from my new fine art site at: https://fineart.jeffcable.com/

• If you are interested in purchasing ANY equipment, please click here to go to B&H Photo, as I get a referral from them if you enter this way. It does not change the cost to you in any way, but it helps me keep this blog up and running.

• Check out my upcoming photo tours to amazing places around the world. I have photo tours to Costa Rica, Peru, Galapagos, Alaska and more. 

 _________________________________________________________________  

Tuesday, February 4, 2025

All new tripods and monopods for me!

In all the years that I have been a photographer, it is not often that I change the brand of products I am using. You know how it is when you get used to something and it works well...it is hard to make a switch. But after many years of using Gitzo tripods and monopods, I am making the switch to Benro

It is not that Gitzo products are not excellent, but they are really expensive, and with so many other high-quality offerings out there, it has gotten harder for me to recommend them when they are so much more expensive than other comparable products. 

(Photo credit: Emma Cable)

I tried to reach out to the people at Gitzo to find out why they were priced so much higher than the others, but never heard back from them. So I started to evaluate other companies that made higher-end tripods and monopods. I did some research online and also reached out to some of my photographer friends in the industry who I trusted the most. (Thanks to Moose Peterson for recommending Benro so passionately.) 

Numerous companies responded to me and sent me products to evaluate. My living room looked like B&H photo with tripods set up all over the place. I methodically went through and tested each tripod and monopod to test the following:

* Rigidity and Sturdiness
* Strength
* Weight
* Size
* Balance

I also took into account the prices for each item and the overall selection that each company had to offer. After a lot of testing, the one company that stood out was Benro

When testing the products, I consistently selected the Benro tripods (without looking at the brand name to know which brand I was using). I feel that the quality of their products is at the same level as Gitzo (which is saying a lot) but with a price point that is more reasonable for the average photographer or photo enthusiast. 

Right now I am using three of their tripods:


I am also using the Benro SupaDupa Monopod which I really like. This monopod extends to a really long length. 

All of these products that I have chosen are made with Carbon Fiber, and feel solid as a rock. The overall quality is excellent, the movement of the hinges and legs feels smooth and solid, and they feel like they are built to last.

I know that Benro also makes tripod heads but I am sticking with the Acratech ball heads, because I still feel that they are the best on the market. I know that they are expensive, but I love that the high-quality build of the Acratech heads and I also love their Swift Clamp for my camera straps. 

I should mention that, even though I am sticking with the Acratech ballheads, I am using the Benro gimbal heads. They have two models which I am using right now. The first is the more substantial carbon fiber GH5CMini, and the other gimbal head I tested is their collapsable gimbal head (seen above) for travel. Both are really nice!

In talking to the people at Benro, I am really excited about their innovations and future products, with so much cool stuff coming down the pipe. 

I am proud to be a Benro Ambassador and super excited to use their products for my events in the Bay Area, on my photo tours, and at the upcoming Olympics. I look forward to seeing my image and name on their ambassador web page soon.


__________________________________________________________

• Subscribe to the Jeff Cable Photography Blog by clicking HERE!

• You can now purchase Jeff Cable Photography images from my new fine art site at: https://fineart.jeffcable.com/

• If you are interested in purchasing ANY equipment, please click here to go to B&H Photo, as I get a referral from them if you enter this way. It does not change the cost to you in any way, but it helps me keep this blog up and running.

• Check out my upcoming photo tours to amazing places around the world. I have photo tours to Costa Rica, Peru, Galapagos, Alaska and more. 

 _________________________________________________________________  

Monday, January 20, 2025

After seeing the LA fires, it should make us all think about remote backups

Last week was complete devastation down in Southern California, with fires burning out of control. This reminded me of the fires up here in Northern California a couple of years ago. It is so sad to see so much destruction and the loss of so many memories. This made me think about family photos and the importance of keeping them safe. 

I highly recommend that you take your most important photos and get them into digital format (if they are not already digital images) and having them stored offsite. For offsite storage, you could use a cloud service like Dropbox, Google Drive, iCloud or many other offerings, or create your own solution. 

When both of my parents passed away, I took their wedding album and took photos of each of the black and white images. I then put all those images into a Dropbox folder so that my brother and sister could have them as well. Since they are in the cloud, I know that they will always be available.

I also went through all of my father's slides and scanned the best of the old photos to keep and share with my siblings. 

Speaking of my siblings, here is a photo of my brother, myself and my sister from 1966. I scanned many slides and then cleaned them up in Photoshop to remove the dust and distractions. 


Here is a photo of me holding a box of Kodak film in 1964. I guess I was always destined to be a photographer. 😀


Here is a photo I took of my son playing with my Mac way back in 1997 (and now he is a photographer too.) This photo and every photo I have taken since the early 1990s are stored on my QNAP NAS drive which gives me some peace of mind. But in order for me to feel that they are ultimately safe, I want them stored in a remote location as well. 

For those of you who have read the blog for a long time, you may recall that I have a redundant QNAP NAS drive located hundreds of miles from my home. They synchronize every day at 1am to make sure that every photo is in multiple places. I currently have more than 2 million photos stored in both locations.

I not only keep my photos stored in numerous places, but all my important documents are saved on these drives and in the cloud.

Regardless of whether you are a professional photographer, a photo enthusiast, or just someone trying to keep important photos and documents safe, I highly encourage you to have those files in more than one location, and far enough from each other to withstand mass destruction like we are seeing more often these days.

My thoughts go out to all those affected by the Los Angeles fires. 


__________________________________________________________

• Subscribe to the Jeff Cable Photography Blog by clicking HERE!

• You can now purchase Jeff Cable Photography images from my new fine art site at: https://fineart.jeffcable.com/

• If you are interested in purchasing ANY equipment, please click here to go to B&H Photo, as I get a referral from them if you enter this way. It does not change the cost to you in any way, but it helps me keep this blog up and running.

• Check out my upcoming photo tours to amazing places around the world. I have photo tours to Costa Rica, Peru, Galapagos, Alaska and more. 

 _________________________________________________________________  

Thursday, January 9, 2025

I am really honored to be a winner in this year's World Sports Photography Awards

A couple of months ago I was asked to submit some of my images to the World Sports Photography Awards. I know this may sound weird to many of you, but I never really enter contests. After some coaxing by my friend, I decided that I would throw some images out there to see if they would be considered.

More than 2200 professional sports photographers from over 96 countries around the world submitted more than 13000 images to this year’s competition, and there were some unbelievable images that made me feel like an amateur. 

I looked through the list of finalists and was blown away. I figured that there was no way I would stand out in this crowd!

You can see all the winners here: https://www.worldsportsphotographyawards.com/winners-and-shortlists-per-year/winners

I felt very honored this morning when I heard that this photo of mine won an award. It was one of my favorites from the Summer Olympics in Paris.

I took this photo with my Canon R5 Mark II camera and the Canon RF 70-200mm lens with the following settings:

* ISO 320

* f/8

* 1/2500th sec

Congratulations to all the other winners who captured some unbelievably amazing photos, and thanks for reminding me that I still have a lot to learn too.


__________________________________________________________

• Subscribe to the Jeff Cable Photography Blog by clicking HERE!

• You can now purchase Jeff Cable Photography images from my new fine art site at: https://fineart.jeffcable.com/

• If you are interested in purchasing ANY equipment, please click here to go to B&H Photo, as I get a referral from them if you enter this way. It does not change the cost to you in any way, but it helps me keep this blog up and running.

• Check out my upcoming photo tours to amazing places around the world. I have photo tours to Costa Rica, Peru, Galapagos, Alaska and more. 

 _________________________________________________________________  

Friday, January 3, 2025

I was going through my father's old slides and look at what I found!

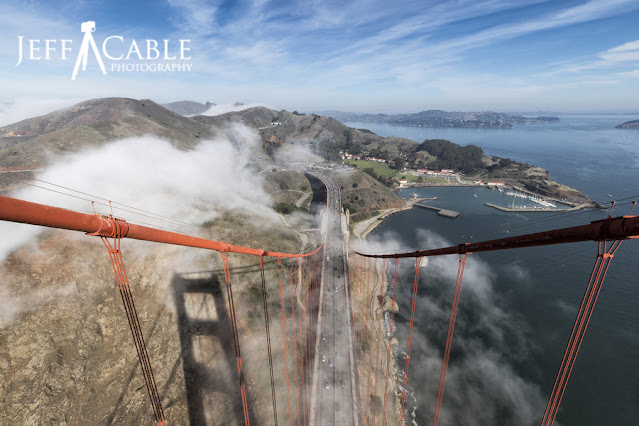
Many years ago I had a chance to go to the top of the Golden Gate Bridge where I was able to capture photographs from the North Tower. It was an amazing experience, and one that I will never forget. For many years, I thought that I was the first and only one in my family to have this privilege. It turns out that this was not the case!


Here is a photo I took facing San Francisco (although the fog had covered the city in this shot).


I also took photos facing the North side of the bridge, facing towards Marin County.

About a year ago I found all my father's slides in a box and I went through hundreds of photos to see which ones I wanted to have scanned. As I was going through the slides and trying to make out what my dad had captured, I came across something amazing. In one of the boxes there were photos that HE had taken from the same location on top of the bridge!! 

Now, you have to remember that this is not open to the public and I have NO idea how he managed to get access to this spot. It took me many years to get up there. He was a doctor and I am assuming that one of his patients had connections, but I am not sure. My father died more than 30 years ago and I don't think there is anyone alive who would know this information.


This is my father's photo from the same North Tower, and as you can see, there have been some changes in the 50+ years that had gone by.


I also found this long exposure photo that he had taken of the Bay Bridge. I know that he had a Leica camera, and assume that he took all these photos with that camera. Back then, this shot was much harder to take since he was shooting film and could only guess at the right exposure. 


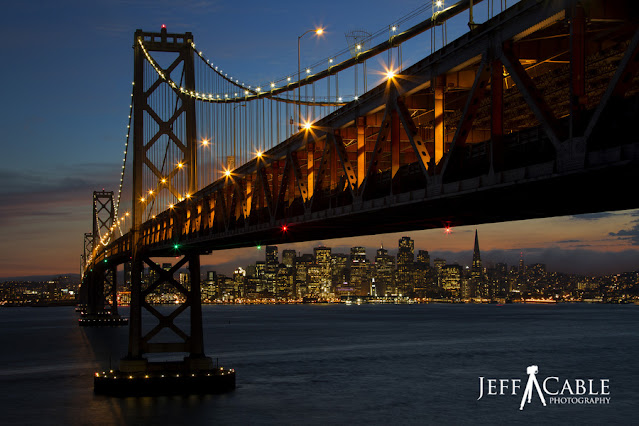
Here is one of my Bay Bridge photos taken from below the bridge, and look how much the San Francisco skyline has changed in all these years!


I know the spot where he took this photo, but this vantage point does not exist any more. I believe that this was taken before the road was built, leading to the fort.  He was low enough that we can not even see Fort Point (which has been there for more than 100 years).


Here is a more recent shot that I took from a similar location. You can see the retaining wall and road where a sandy beach used to be.


Here is an aerial photo that my father took over San Francisco. I am assuming that he took this out of a big airplane while coming into or out of San Francisco Airport.  It is crazy to see how few high-rises existed back then.


And here is an aerial photo that I took a couple of years ago from a small airplane, as we circled the city specifically for me to get photos.

This is a night shot that I took over the city, which would have been almost impossible to take back in my dad's days. I was using a Canon R5 mirrorless camera, pushing my ISO to 6400 and able to check my exposures as I was shooting.

Even though my father was an amateur photo enthusiast, it was really cool to see what he had captured back in his time. The funny thing is...I don't remember him taking many photos and never heard him talk about his camera. But all these years later, it is fascinating that we shared a similar rare and unique experience being at the same location on the Golden Gate Bridge and capturing images from the same vantage point. I love that!


__________________________________________________________

• Subscribe to the Jeff Cable Photography Blog by clicking HERE!

• You can now purchase Jeff Cable Photography images from my new fine art site at: https://fineart.jeffcable.com/

• If you are interested in purchasing ANY equipment, please click here to go to B&H Photo, as I get a referral from them if you enter this way. It does not change the cost to you in any way, but it helps me keep this blog up and running.

• Check out my upcoming photo tours to amazing places around the world. I have photo tours to Costa Rica, Peru, Galapagos, Alaska and more. 

 _________________________________________________________________  

Monday, December 23, 2024

The best settings for your Canon R5 Mark II and Canon R1 cameras


Over the last couple of months, I have had a lot of people ask me about my setup for the new Canon R1 and Canon R5 Mark II cameras. Specifically they are asking about what I change on my menus and how I set up my focus buttons.

In this blog post, I want to share with you all my recommended menu changes for both cameras. Whether you are setting up the camera for the first time or maybe looking to make some tweaks to a camera you already have been using, I hope this helps.

I am going to take you through a bunch of menus to help you make the changes and explain why I suggest these settings. I should also mention that these are my recommended settings that I feel are best for almost all photographers. That does not mean that these are perfect for everyone, but they work great for me. Consider this my holiday gift to you all. 😀

The Red Menu

* Image Quality - I always set my camera to shoot in RAW mode and turn off JPEG. I do this because RAW give me the best quality images and I don't need JPEGs. If I do need JPEG images, I can easily convert my RAW files on my computer. Also, you may not know this, but when capturing both RAW and JPEG images, it really slows down your camera buffer clear.

* ISO Speed Settings - I like to set the lowest ISO of the camera's ISO Speed Range to L (which is ISO 50). This is handy when I am shooting waterfalls or daytime shots when I am trying to kill the shutter speed to get motion in my images. It is rarely used, but an easy tweak to set this up for those instances where it is desired.

* Color Space - I change sRGB to Adobe RGB in the rare case that I do shoot JPEGs. I like this color space better.

* Drive mode - I always default this to a slow burst mode. I NEVER shoot in the single shot mode.  Regardless of what I am photographing, I want to take a short burst photos of each person or scene. I will turn this up to a faster burst rate when I am photographing sports or wildlife.

* Shutter mode - I usually take photos in Elec. 1st-curtain mode since this works best for most captures, including when I am using a flash on camera. Even though full Electronic shutter is nice for some conditions, I find it restrictive for flash photography and long exposures. 

* Release shutter without card - Turn this OFF. I really hate that Canon defaults this to on, since it means that people can use the camera without a memory card in the slots. Why would you ever want that?! 

The Purple Menu (Auto Focus)

* AF operation - I set this for Servo focus since I almost always want the camera to track the focus on my subjects whether they are moving fast or not.

* Subject to detect - I leave this on People unless I am traveling to Costa Rica, Africa or other locations where animals are the main subjects. 


The Blue Menu (Playback)

* Highlight alert - I definitely enable this since I want to get a visual representation of over-exposed areas in my photos. I use this as opposed to the histogram (which I never use).

The Yellow Menu (Tools)

* Record func+card/folder set - I set the second line which is the Camera records options to Rec. to multiple so that I am writing the same RAW files to both memory cards in my camera. I worked in the memory card business for more than 10 years and know how finicky they can be. Even though I use the best cards on the market (ProGrade Digital), I still always write my images to both cards.

* Play - I set this to card 1 and I also check mark the Info Priority box so that it stays on card 1.

* Record/play - I set this to card 1 and I also check mark the Info Priority box so that it stays on card 1.

* Auto rotate - I change this to the middle option which is the "On (computer icon)" so that the images will be rotated correctly on my computer but show full screen on my camera LCD. 


The Green Menu (Tools) - And this is an IMPORTANT ONE!!


Customize buttons for shooting - I change numerous items in this menu to get the camera working the way I want it. Even though back button focus is less imperative than it used to be, I still prefer it, so I change the following things:

1. Shutter button to "Metering start" so that the focus mode is determined by the back buttons only.
2. AF-On button to eye detection (and with eye control on when setting the Canon R1)
3. AE Lock button to "Metering and AF start" and I change the Detail settings to "AF operation to Servo", Whole area tracking "Off", Subject to detect "Off", Spot detection "Off", Eye detection "Off" 

When setting all these, this will give you face detection on the AF-On button and a single focus point (servo) on the AE Lock button. I use this ALL the time. If I have a person or animal in front of me, most of the time the face and eye detection works great, but for the times when it is not locking on or I don't have a person or animal in front of me, I use the AE Lock button to establish my focal point.

Customize dials/control ring - I change this so that the Main dial is AV, the second dial is ISO and the back dial is TV. I leave the Control ring for exposure compensation, but rarely use the control ring.

* Eye control - I turn this on and train it. I also turn the Pointer display settings to Off since I find it really distracting having the pointer moving all over the display when I am shooting. 


The "other" Green Menu (My Menu)


This screen is rarely used by hobbyists but widely used by professional photographers. With that said, I think that it should be used by everybody! This menu lets you put your most used menus on one screen.  I have mine set for these:

* Image type/size
* Subject to detect
* Highlight alert
* Record func+card/folder
* Format card
* Eye control on/off


Regardless of whether you are using the Canon R1 or the Canon R5 Mark II, I hope that this helps all of you to get better control of your camera and take even better photos. They are both amazing cameras and the settings really do matter.

Happy holidays to you all!


__________________________________________________________

• Subscribe to the Jeff Cable Photography Blog by clicking HERE!

• You can now purchase Jeff Cable Photography images from my new fine art site at: https://fineart.jeffcable.com/

• If you are interested in purchasing ANY equipment, please click here to go to B&H Photo, as I get a referral from them if you enter this way. It does not change the cost to you in any way, but it helps me keep this blog up and running.

• Check out my upcoming photo tours to amazing places around the world. I have photo tours to Costa Rica, Peru, Galapagos, Alaska and more. 

 _________________________________________________________________